Monday, August 8, 2011

What is Art Lounge Like? Part 2....Painting Projects.

Art Lounge is made up of 4 nine week sessions.

The first session was an introduction to blogging, where we designed and named this blog, Art Juggler!

The second session of Art Lounge was all about self-portraits. We created a dual portrait painting and a clay sculpture using air-dry clay.

For the dual portrait project, we took a look at a Missouri art teacher who is on a quest to create 365 self-portraits...or a self-portrait-a-day. Wow! What a task! You can follow him here. Not only does he create varied and interesting self-portraits every day, he ALSO writes a blog post about each one!!

Jim's artwork is a great source of inspiration!!


Sadly, the second session was cut short by a couple of weeks because of the tornado.

The third session was held over the summer, watch updates from the summer session soon!!

If you are thinking about taking Art Lounge, the fourth session begins the Monday after Labor Day in September, running 9 weeks this fall. The class will meet from 4 p.m. to 7 p.m. and the cost of the class includes dinner at every session! Art making and dinner, how awesome is that!? Oh yeah, this fall, we will be visiting the studio of a local artist. It will be great!!

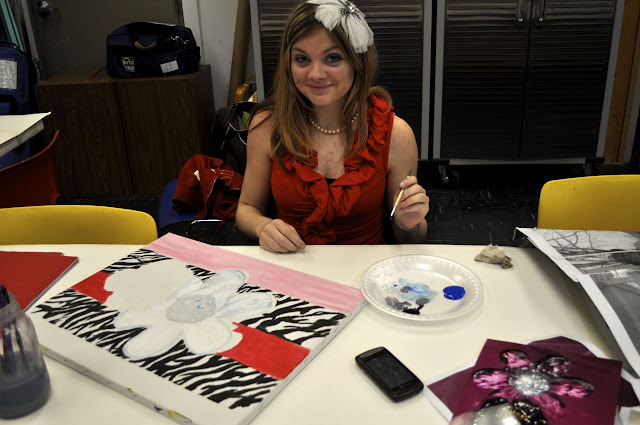
The following photos are from the dual self portrait paintings.  We had to show two versions of ourselves simultaneously.


You can see a video of us working in this post.

Wednesday, July 27, 2011

DIY Faux Cast Aluminum Sculptures

 This is a great carving project which has stunning results, using mostly house-hold items!

 You will need:
  • Soap (either full bars or travel size, we like the free ones from hotels)
  • Carving tools (potato peeler, paring knife, exacto, utility knife, speedball linoleum cutter, and if the soap is soft you could use an ink pen)
  • Foil tape, can be found at hardware stores like Lowe's or Home Depot
  • Large pink eraser or cork
  • Black paint and brushes
  • Paper towels
  • Wire
Step 1:
Gather your materials and sketch out a design for your soap.
Some soaps are difficult to carve while others can practically be molded with your fingers. We had a huge stash of soaps from hotels.


When selecting your tools, think about ordinary objects that might be used to create cool textures in the soap. The potato peeler is great for carving off edges while the cheese grader works like a wood rasp to create a shaved texture on the surface of the soap.
 The wire can be used to fix anything that might break off....It is also good for assembling pieces to a base.


Step 2:
 Carve your design into the soap using your carving tools. A speedball lino cutter works really well for images like this face. Remember to create a relief on the surface, leaving some areas raised.


If your sculpture is in-the-round, like the one below, you will need to carve every side.
  
Step 3:
 Cover your soap carving in foil tape. We like to cut small squares and strips to make covering easier. When the entire surface is covered, use a pink eraser or cork to burnish the surface, flattening some of the creases, by rubbing it with a piece of rubber or cork, you help the foil to adhere to the smaller details, showing off the relief and adding texture.
They look a little like foil bunnies at Easter!

Step 4:
If you create a base for your sculpture, or if a piece of it breaks before you cover it in foil tape, you can use wire to attach the pieces together. Be sure to give your soap the 'poke' test before you use it in your sculpture, if it is too hard to poke wire into, you won't be able to use it as a base or attach it to a base.


Step 5:
Once your sculpture is covered in foil tape, and the pieces are assembled, use a paint brush to cover the surface in black paint. The black paint will fill in the cracks. Wipe off the paint before it dries. This will give your sculpture the look of cast aluminum!

Make a series of sculptures and show them off!


If you try this sculpture yourself, please leave a comment with a link to your project, we would love to see it!!

Wednesday, May 18, 2011

What is Art Lounge Like? Part 1....Art Notebook

 When we first showed up to Art Lounge, we were presented with the question: sketchbook or binder?

The catch was, there were only 2 sketchbooks, so if too many of us wanted one, we would have to wait.

Being the impatient person I am, I chose a binder, since there were plenty of them, I was able to get it that night. At first I didn't know what to do with it, but after a few weeks, I went crazy working on my notebook.


I filled it with a lot of collages torn from my school sketchbook. Over time, it became more of an inspiration book. Anytime I found images that I liked for aesthetics, or for what the image actually was, they went right into my notebook.

At this point, my notebook is almost filled to the brim. For an artist's book, it's not  random as it should be. I ended up having a method to my madness.


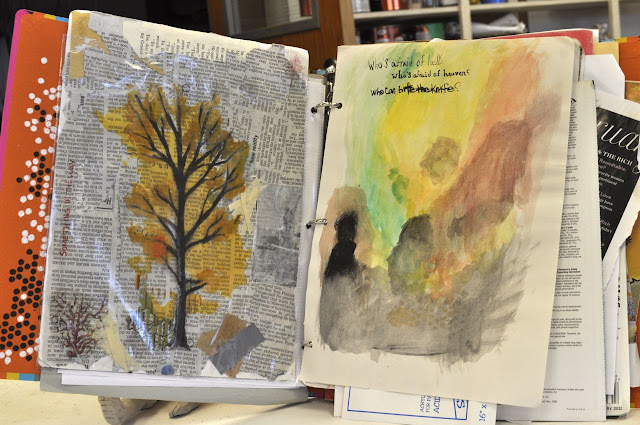
These two are my favorite pieces. On the left, I managed to turn a see-through map of Russia into a tree, on the right, an album cover from the band, My Passion.

Thursday, May 5, 2011

We are working on some paintings....

Watch us work!!


Aren't time lapse videos so cool?

See the finished paintings on the blog soon! Also, come to Spiva to see them in person on June 1st at our Art Lounge Open House! 

Thursday, April 7, 2011

a vistit to red velvet

Over spring break our parents took us on a trip to Springfield, MO. Our mother has been keeping up with our blog and we told her about the blog, A Beautiful Mess.

Mom knows I love vintage clothes and all the people in our family love cupcakes. So, we got to Red Velvet and they were doing an interview and we walked in.  There were vintage clothes everywhere!

Also, there were old TVs, vintage cameras, etc. Then, we saw the Red Velvet cake shop (inside Red Velvet) and we ordered a snicker doodle cupcake and peanut butter cupcake.  They were the best cupcakes i have ever had! 


My favorite part was the dressing room where you can try on all of the clothes for sale there, and the vintage hats I could also try on.


We also got to be on the news broadcast they were having. I am very lucky to have gotten the experience to go to Red Velvet and meet another blogger just like me.

My brother has also written about his experience on his blog, The Creative Blast go check it out!!

Wednesday, April 6, 2011

Shadows run rampant!

April has come and with it, fabulous weather. We're all in shorts and summer shirts with the windows open. Today was the first day that not only the weather was nice, but that  the wind was tolerable. We took advantage of our window of opportunity to finish a project we started a few weeks ago.

 Way back in March, we started the silhouette project. We walked around and worked so long and hard on our shadows, but the wind was just not feelin' it that day. It almost made away with Preston's pikachu.

Well, anyways, the wind allowed us to carry out our  project and 'deface' downtown =)


An awesome group shot =)

Thursday, March 31, 2011

Art Lounge...in the news!

Art lounge, a hip, safe place for students to explore the visual arts.

Watch this video clip to find out more about this class at Spiva!


Check out the behind the scenes images from the interviews!


Big thanks to David @whitneyscottphotography.com for formatting the video for our blog!