Showing posts with label DIY. Show all posts

Friday, February 17, 2012

Wardrobe Remix Part 1

We are going to show you some fun ways to remix your wardrobe!!

Visiting artist Martha Goldman came to Art Lounge last week to demonstrate some amazing fashion ideas.


Project 1
Vintage Applique
Supplies needed: pattern or template sketched on a paper bag, needle, thread, scrap fabric, and an article of clothing from your own wardrobe that needs a MAKEOVER! You could even take an old screen printed tee shirt, and cut out the image, using this method to transfer it to your 'new' project.

How to: 
1. Transfer your pattern to some scrap fabric (we traced in sharpie).
2. Make sure to pre-wash your scrap so that the fabric doesn't buckle.
 3. Cut it out and pin it to the shirt/bag/sweater/skirt that you want to transfer to and sew it on.
4.  Also, stretch your garment onto a piece of cardboard or use an embroidery hoop before you start sewing so that the material is taught.
5. You can hand sew using a whip stitch, or regular stitch, for a more 'vintage' look...or use a sewing machine. Be sure to add paint, a button or felt to embellish and 'finish' the look of the cut-out.


Project 2
Jersey Cotton necklace scarf
Supplies needed: old tee shirts, scissors

How to: Did you know you can cut a ring from an old tee shirt, stretch it a bit and it will roll up into a great little loop that is perfect for a necklace or a layered scarf? So easy! You can cut up lots of colors and layer lots of loops for a necklace, or take a printed tee and make a fat scarf.


Here is a peek at some our our own creations!! We can't wait to show you the finished product, check back soon!!


Monday, August 8, 2011

What is Art Lounge Like? Part 4.....Celebrations

Art Lounge is a community of student artists, coming together each week to talk about art and create art. We eat, we paint, we blog. It is an amazing experience each week to share with friends at Spiva.

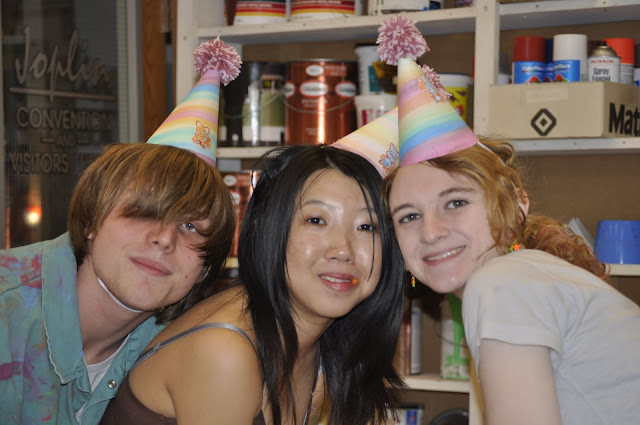
Recently, we celebrated a birthday with a little party, complete with ice cream cake and decorations. 


 We made our own decorations using Martha Stewart's guidance. Click here to see how to make your own tissue paper pom poms.
 Blogging!
 Eating cake!!
 ICE CREAM CAKE!?!

A close up of the party hats. Want to make your own?

Print out a blank party hat template on a sheet of white cardstock. Find the PDF here.
Make a pompom for the top using yarn. See a tutorial here.
Paint your party hat with water color paint. Let it dry, shape it into a cone. Add a sticker, staple some elastic on the bottom and hot glue the pom pom to the top. You could also add some fun fringe along the bottom edge. 

This was a memorable night...after hanging all the decorations as a 'surprise' for the birthday girl, we found out that it was sort of her worst nightmare. She hates it when things hung from the ceiling float back and forth, she is always worried that ghosts or something are controlling them. Haha, we had a good laugh about our new pretty pom pom classroom decorations.

Wednesday, July 27, 2011

DIY Faux Cast Aluminum Sculptures

 This is a great carving project which has stunning results, using mostly house-hold items!

 You will need:
  • Soap (either full bars or travel size, we like the free ones from hotels)
  • Carving tools (potato peeler, paring knife, exacto, utility knife, speedball linoleum cutter, and if the soap is soft you could use an ink pen)
  • Foil tape, can be found at hardware stores like Lowe's or Home Depot
  • Large pink eraser or cork
  • Black paint and brushes
  • Paper towels
  • Wire
Step 1:
Gather your materials and sketch out a design for your soap.
Some soaps are difficult to carve while others can practically be molded with your fingers. We had a huge stash of soaps from hotels.


When selecting your tools, think about ordinary objects that might be used to create cool textures in the soap. The potato peeler is great for carving off edges while the cheese grader works like a wood rasp to create a shaved texture on the surface of the soap.
 The wire can be used to fix anything that might break off....It is also good for assembling pieces to a base.


Step 2:
 Carve your design into the soap using your carving tools. A speedball lino cutter works really well for images like this face. Remember to create a relief on the surface, leaving some areas raised.


If your sculpture is in-the-round, like the one below, you will need to carve every side.
  
Step 3:
 Cover your soap carving in foil tape. We like to cut small squares and strips to make covering easier. When the entire surface is covered, use a pink eraser or cork to burnish the surface, flattening some of the creases, by rubbing it with a piece of rubber or cork, you help the foil to adhere to the smaller details, showing off the relief and adding texture.
They look a little like foil bunnies at Easter!

Step 4:
If you create a base for your sculpture, or if a piece of it breaks before you cover it in foil tape, you can use wire to attach the pieces together. Be sure to give your soap the 'poke' test before you use it in your sculpture, if it is too hard to poke wire into, you won't be able to use it as a base or attach it to a base.


Step 5:
Once your sculpture is covered in foil tape, and the pieces are assembled, use a paint brush to cover the surface in black paint. The black paint will fill in the cracks. Wipe off the paint before it dries. This will give your sculpture the look of cast aluminum!

Make a series of sculptures and show them off!


If you try this sculpture yourself, please leave a comment with a link to your project, we would love to see it!!